Changing a Flat Tire in 13 Steps
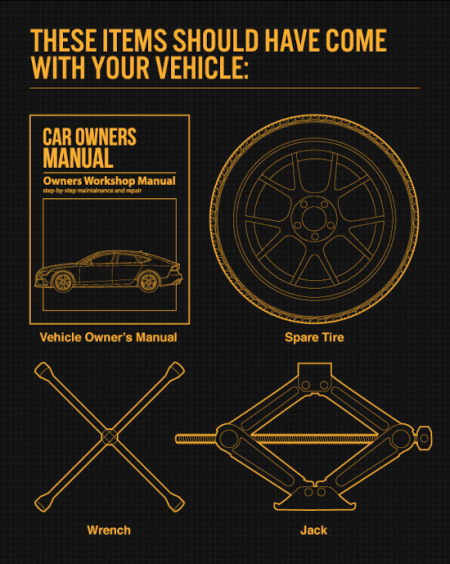
If you have misplaced any of these items, or if your car did not come with these items, you should purchase new ones right away.
Be sure you’re regularly inflating the spare tire to your vehicle manufacturer’s recommended PSI. You should check the spare’s air pressure every time you check your other tires. Remember to check pressure every month and before long trips or carrying extra load.
If you find yourself in a situation where you have a flat tire, follow these 13 steps to solve the issue.
1. Find a safe location.
As soon as you realize you have a flat tire, do not abruptly brake or turn. Slowly reduce speed and scan your surroundings for a wide shoulder or parking lot. Never attempt to change your tire on a narrow shoulder near oncoming traffic. Keep moving (slowly) until you find a safer spot.
2. Turn on your hazard lights.
Your hazard lights or emergency flashers will allow other drivers to see you on the side of the road. To avoid an accident, turn them on as soon as you realize you need to pull over.
3. Apply the parking brake.
Once you have stopped, always use the parking brake when replacing a flat tire. This will minimize the possibility of your vehicle rolling and causing injuries.
4. Apply wheel wedges and remove the hub cap or wheel cover.
- Wheel wedges go in front of or behind the tires to ensure the vehicle doesn’t roll while you fix the flat tire. If you’re changing a rear tire, place these in front of the front tires. If your flat tire is at the front, put the wheel wedges behind the rear tires.
- If your vehicle has a hubcap covering the lug nuts, it’s easier to remove the hubcap before lifting the vehicle with the jack.
5. Place the jack under the vehicle and loosen the lug nuts.
- The right place for the jack is usually beneath the vehicle frame alongside the tire that’s flat.
- To safely lift and avoid damage to the vehicle, follow the instructions for jack placement in your vehicle owner’s manual.
- Using the lug wrench, turn the lug nuts counterclockwise until you break their resistance.
- Loosen the lug nuts about ¼ to ½ of a turn, but don’t remove them completely yet. Remove them completely when it’s time to remove your tire/wheel from the vehicle.
Learn about our C.A.T. (Collision Avoidance Techniques) Clinic!
6. Raise the vehicle with the jack and remove the lug nuts completely.
- To prevent the jack from settling under the weight of your vehicle and coming off balance, place a small cut of 2×6” wood beneath it before attempting to raise your vehicle. This tactic is especially helpful on asphalt.
- With the jack properly positioned, raise the vehicle until the flat tire is about six inches above the ground.
- Remember to never put any part of your body under the vehicle during or after raising the vehicle with the jack.
- Now it’s time to remove the lug nuts all the way. Since you’ve put your car up on the jack and already loosened them, you should be able to unscrew them mostly by hand.
7. Remove the flat tire and mount the spare tire on the lug bolts.
- Pull the flat tire toward you until it’s completely free from the hub behind it. Set it on its side so that it doesn’t roll away.
- Now place the spare on the hub by lining up the rim with the lug bolts. Push gently until the lug bolts show through the rim.
8. Tighten the lug nuts by hand.
- Put the lug nuts back on the lug bolts and tighten them all the way by hand.
- You will tighten them with the wrench after lowering the vehicle to the ground
9. Lower the vehicle and tighten the lug nuts again.
- Use the jack to lower the vehicle so that the spare tire is resting on the ground but the full weight of the vehicle isn’t fully on the tire.
- You should tighten the lug nuts with the wrench, turning clockwise. Push down on the lug wrench with as much weight as possible.
10. Lower the vehicle completely and replace the hub cap.
- Bring the vehicle all the way to the ground and remove the jack. Give the lug nuts another pull with the wrench to ensure they’re as tight as possible.
- If the hubcap you took from the flat tire will fit your spare, put it in place the same way you removed it initially. If it doesn’t fit, put it away with the tire when you stow your equipment.
11. Track your equipment and put it away safely.
You have a jack, a lug wrench, wheel wedges, your flat tire, and possibly a hubcap. Don’t forget to put all of them in your vehicle before driving away.
12. Check the pressure in your spare tire.
You should check the tire pressure of the spare tire to make sure that it is safe to drive on. “T-Type” temporary spares, also called “mini-spares,” require 60 psi (420 kPa). If the tire needs pressure, drive (slowly) to a service station immediately.
13. Take your flat tire to the mechanic.
Temporary spare tires aren’t made to drive long distances or at high speeds, so drive cautiously until you’re able to visit a tire technician. A professional should be able to determine whether your tire needs a repair or if it’s time to replace it.